Browse Author

katherinefcushen

My Favorite Items for Surviving Pregnancy, Postpartum and the 1st Month with Baby!

I know, I should probably break these down into three separate blog posts, but let’s be real… I’m a brand new first time mom and the only time I have to work on this is while my husband is holding baby. Plus, if you’re about to be a mom, this will save you the time of finding separate posts.

Let’s start at the beginning.. PREGNANCY SURVIVAL.

  1. Ginger Candy – I was skeptical, but these were cheap and really helped. During my first trimester I was constantly just a liiiittle nauseated, so having these handy was nice.
  2. Flip Flop Slippers – I know. These sound ridiculous, but in my first trimester, I was overheating A LOT, and I felt like a lot of it was coming from my feet, so my husband bought these for me as a surprise. I thought they were silly, but ended up LOVING them and then loving them more when my feet started swelling at the end of my third trimester and none of my shoes fit. I even took them to the hospital.
  3. Belly Support Band – In my second trimester when my belly started getting bigger and we decided to paint the whole house, this probably single-handedly saved my back. Also, round ligament pain is terrible. This helps.
  4. Maternity Panties – (These should really be in the POSTPARTUM section too.) Ok, so I actually bought several brands of these and the ones I’ve linked by HOFISH were my favorite. They run a little big, so I was actually able to pull them up over part of my bump for a while, and postpartum they’re still awesome because not only do you not go back to your regular size immediately, but you’ll be using sanitary napkins for a while too.
  5. Superfood Shake – I’m a huge advocate for this NOT pregnant, but PREGNANT I was really grateful to have it! My doctor approved it as my prenatal (I just supplemented iodine and folate, JUST in case.) While I was pregnant, I HATED vegetables, so some days this was the only thing I was able to eat that wasn’t covered in cheese. Pregnancy is weird. Ask me if you want more info on this!
  6. Plant Based “gatorade” – I’m not sure I could have totally survived my pregnancy without this. Like vegetables, I also hated water for a lot of my pregnancy, so having this helped me get more water in my day AND tremendously helped with swelling in my third trimester. Ask me if you want more info on this!
  7. Maternity Clothes – EMBRACE it. You’re pregnant. Be COMFORTABLE!
  8. Maternity Robe – (This also goes in the POSTPARTUM section!) I LOVE this robe by Pinkblush. In fact, I’d get two. It’s SO soft, and it honestly made me feel more comfortable about my new body as I was getting ready in front of the mirror. Postpartum, if you nurse or you’re like me, you’ll basically live in leggings, a nursing bra and a robe.
  9. EXERCISE – Seriously. I really believe exercising my whole pregnancy helped me through labor (less than 12 hours and only 3 real pushes!) If you need help with prenatal workouts, I got you, babe! (Get your doctor’s approval, but statistically, working out while pregnant is one of the best things you can do for you and baby!)
  10. Ovia Pregnancy App (for iphone or andriod) – Of all the apps I found (and there are a LOT), this one was my favorite. It seemed to be the most accurate, easiest to navigate, and it had the best features.

POSTPARTUM SURVIVAL

You’re going to find list after list of things you should get to make postpartum recovery easier. It will vary wildly for you, but these are some of the things I used MOST that have been super helpful. (I had a vaginal delivery with minimal tearing, so I can’t help much with the c-section recovery for instance.) I am also breastfeeding.

  1. Haakaa Manual Breastpump – This this is worth every bit of the less than $15 that it cost. Use it on the opposite side you’re feeding baby and catch the extra let down instead of wasting liquid gold. They make another version with a stopper and a suction base that might be even better. (The only note to this product I would make is that you need to pay attention because it can be kicked off by baby or you may accidentally knock it off yourself, and it will spill.. you might literally cry over spilled milk.)
  2. Nursing Sleep Bras – These are totally necessary. It didn’t occur to me that once I had a baby I would be wearing a bra pretty much 24/7– excluding showers. Get some without wires, the correct size and that don’t have hooks in the back cause you’re gonna be sleeping in them!
  3. Tucks / Dermoplast – Buy these before you go to the hospital, but ASK YOUR NURSE for these at the hospital too! You’ll feel like the oldest person ever when you buy them, but you’ll be thanking yourself tenfold that you have a ton of it after that baby comes.
  4. Compression Leggings – ok, I wish I’d had these my whole life.. not just postpartum, but they’re a MUST postpartum. I’m sure a lot of brands are great, but I love my BellyBandit Mother Tucker Leggings! They were doubly vital because baby was born in November!
  5. Postpartum Belly Wrap – GET ONE OF THESE. Again, I loved the one I got from BellyBandit. My husband was in the room when I first put it on, and I let out an audible sigh of relief that was so noticeable he commented on it! I imagine it would have been even more useful had I had a c-section, but the added support was E V E R Y T H I N G.

BABY NECESSITIES

Again, SO many great lists out there, but these are the things we found helped with our sanity and just made things easier!

  1. Infant Bed – I love having a place to put Jackson down and know he was safe. This bed by Mumbelli is QUALITY and less expensive than some of the others, but it comes with a wedge in case baby has reflux, and the whole thing is washable. I also LOVE this one.. it comes with a wedge as well, and it plays music, has a night light and is perfect if you travel.
  2. Wipe Dispenser – omg.. get one of these! I love not having to open a pack of wipes for every diaper change!
  3. Swaddle – a GOOD stretchy material we’ve found works best! I found one on Etsy that I love, but Cooper Pearl makes a great one too! I’d also highly suggest having a Halo Sleep Sack with the Swaddle flaps for when you can’t swaddle anymore! Our hospital gave us a newborn size.
  4. Caddy – Theoretically, you could move this to any room where you will be changing diapers, but we keep it on top of the dresser/changing table. I love that with this one you can adjust the compartments. We keep diapers, diaper cream, baby lotion, lanolin, hand sanitizer, and a bulb sucker in it. It’s so much easier to have that stuff out than in a drawer, and this keeps it organized.
  5. Sound Machine / Night Light – We LOVE this one! So many people suggested white noise would change our lives, and it really did! I love that this one has so many settings, colors and sounds and, it can be controlled from your phone.
  6. Owlet – I sleep so much better knowing this little thing is watching baby all night.. I don’t even care that one of my best friends called me a helicopter mom. It’s one of the most expensive things we got, but we were able to cover it with our HSA/FSA!
  7. Bottle Drying Rack – this is on pretty much every list, but it’s a must!
  8. “Baby Tracker” – this app is amazing! It’s so hard to keep track of diapers, feedings and even sleep… especially if you have an awesome partner like I do that often takes care of some of these things. There are several apps that do this, but this one was designed to be used on multiple devices and is available on iOS and Android.
  9. Burp Cloths – I’m pretty sure we have 25 of these, and I thought that was a lot, and then one day I realized they were all dirty. I kind of wish we had 50.
  10. Pacifier – I wasn’t sure I’d give baby a pacifier, and then one night right after we brought him home, all his other needs had been met but he was still fussy. Decided to try the pacifier (we literally only had one just in case), and it worked. So, here we are. I’d suggest having one on hand cause babies like to suck, and our pediatrician reminded us it was better they suck on the pacifier than their hands. Just do your research. We use these orthodontic ones by Smilo.
  11. Moms on Call – If you ever want to sleep (for us more than 4 hours), get this book! There is so much good information about newborns, sleeping, eating, etc! I wish I’d read it BEFORE he was born.

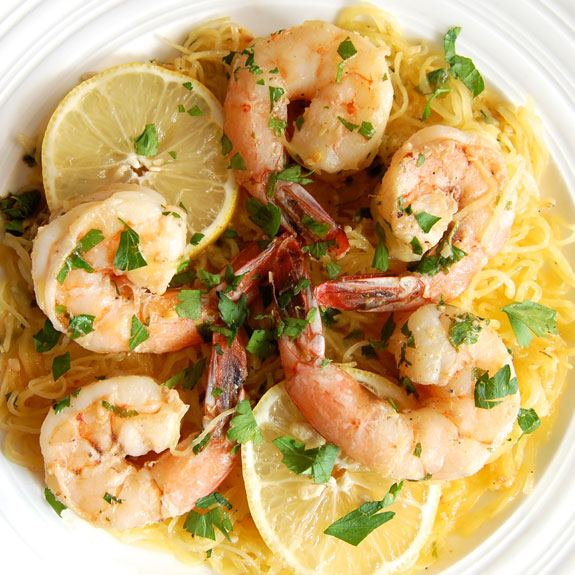
Spaghetti Squash Shrimp Scampi (Grain-Free & Low Carb)

This is one of my FAVORITE spaghetti squash recipes! SO easy and yummy! Tip: focus on picking out a squash that has a rich yellow color to ensure ripeness.

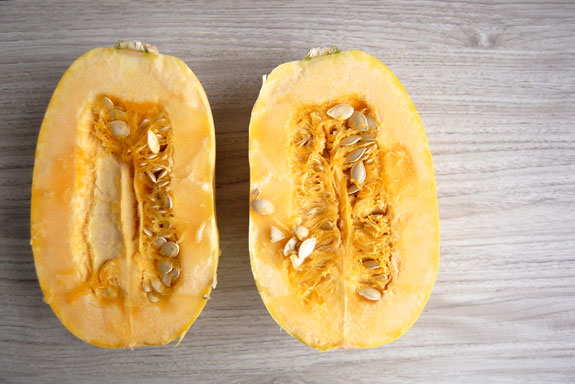
To prepare the spaghetti squash, place it in the microwave for 3-5 minutes to make it easier to cut. Some people just microwave the squash to cook it entirely, but I believe that roasting it in the oven is the best way to cook it. To open up the squash, carefully cut it in half lengthwise using a large, sharp knife.

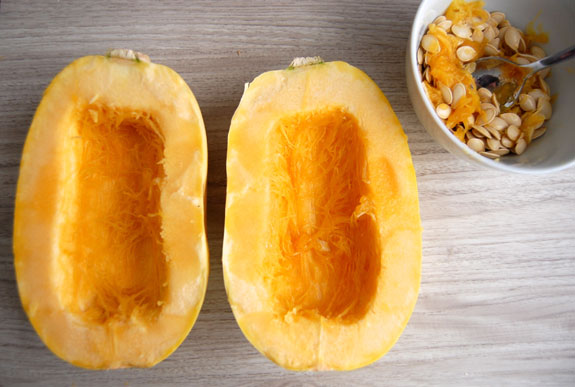
The seeds should be scooped out of the squash with a spoon, similar to a pumpkin. Also similar to a pumpkin, the seeds can be preserved and roasted if you like. After scooping out the seeds, you drizzle the squash halves with olive oil and any desired seasonings, place on a baking sheet, and roast for almost an hour.

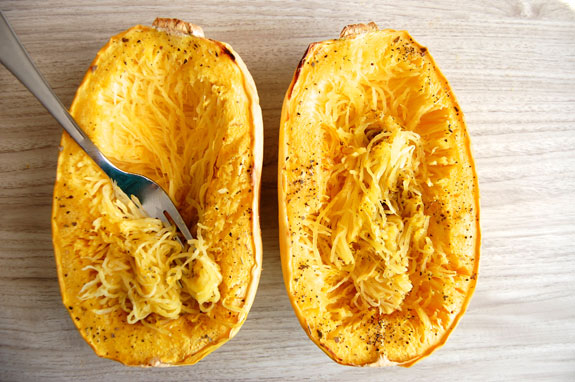
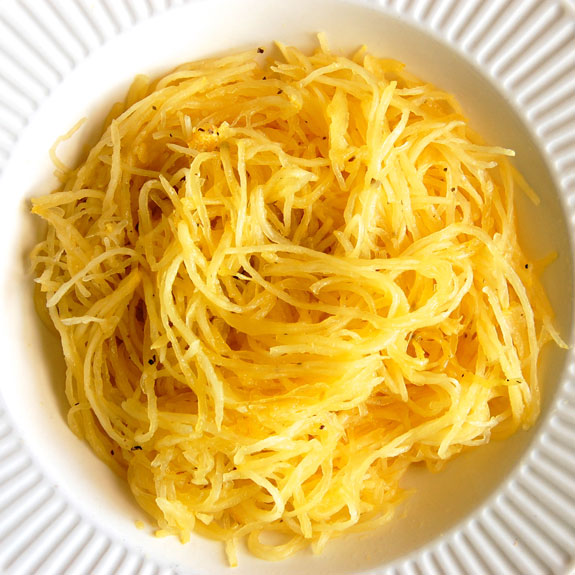
Once the squash is soft and can be poked with a fork, you can shred the insides to get the spaghetti-like strands that the squash is named for. You might want to wait until the squash has cooled down enough to handle.

For the “pasta”
  1. 1 spaghetti squash
  2. Extra virgin olive oil, for drizzling
  3. Salt and pepper
  4. 1 tsp dried oregano
  5. 1 tsp dried basil
For the shrimp scampi
  1. 8 oz. shrimp, peeled and deveined
  2. 3 tbsp butter
  3. 1 tbsp extra virgin olive oil
  4. 2 cloves garlic, minced
  5. Pinch of red pepper flakes
  6. Salt and pepper, to taste
  7. 1 tbsp fresh parsley, chopped
  8. Juice of 1 lemon
  9. Zest of half a lemon
Directions
  1. Preheat the oven to 400 degrees F. Place squash in the microwave for 3-4 minutes to soften. Using a sharp knife, cut the squash in half lengthwise. Scoop out the seeds and discard. Place the halves, with the cut side up, on a rimmed baking sheet. Drizzle with olive oil and sprinkle with seasonings. Roast in the oven for 45-50 minutes, until you can poke the squash easily with a fork. Let it cool until you can handle it safely. Then scrape the insides with a fork to shred the squash into strands.
  2. After removing spaghetti squash from the oven, melt the butter and olive oil in a skillet over medium heat. Add in the garlic and sauté for 2-3 minutes. Then add in the shrimp, salt, pepper, and a pinch of red pepper flakes. Cook for 5 minutes, until the shrimp is cooked through. Remove from heat and add in desired amount of cooked spaghetti squash. Toss with lemon juice and zest. Top with parsley to serve.

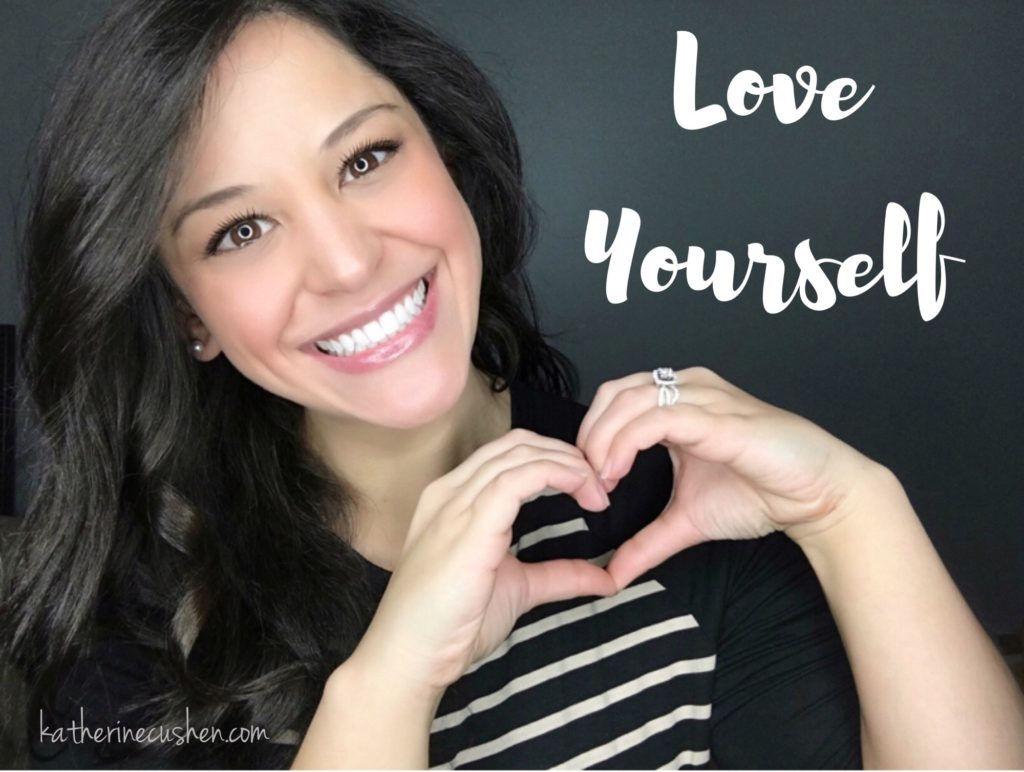
Love Yourself!

Today, tomorrow, this week, this month, this year— I want you to practice SELF LOVE, and that starts with taking care of YOU!

Want a free gift for telling me WHY you love yourself? Keep reading!

My current fitness accountability group is all about loving yourself, and waking up each morning to all the positivity in my group brings the biggest smile to my face! Because I’ve gotten so many last minute requests to join, I’m opening up THREE more spots! ?

I’m looking for 3 women that:
are ready to be healthy.
want to spread love in this world.
are ready to commit to loving themselves.

If this is you, or you just want more information, tell me WHY you love yourself by clicking HERE: http://love.katherinecushen.com/ or comment below!

Gluten-Free Spaghetti Squash Pizza Crust

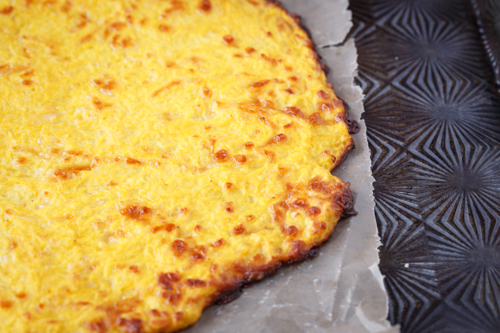
{GLUTEN-FREE} SPAGHETTI SQUASH PIZZA CRUST

I’m OBSESSED with Pizza, so when I found this.. I thought, ALRIGHT! HEALTHY AAAAND I get to feed my obsession!

*To be honest, I haven’t made it yet, but I’ve heard REALLY great reviews!*

FIRST: You’ll want to get as much moisture out of the squash as possible. I know it doesn’t look like it, but those little strands are holding a whole lot of water. Watery squash makes for flimsy pizza.

And flimsy pizza is just plain sad.

Let me know if you make this!

COOK TIME
1 hour 15 mins
TOTAL TIME
1 hour 15 mins

Serves: 1 approximate 10-inch pizza crust
INGREDIENTS
1 medium/large spaghetti squash
1 tablespoon olive oil
1 egg, lightly beaten
½ cup shredded mozzarella cheese
1 tablespoon shredded parmesan cheese
Kosher salt
Freshly ground black pepper

Instructions:
1. Preheat oven to 400°F. Carefully cut your spaghetti squash in half with a large, sharp knife. Remove seeds and stringy guts, and brush the cut sides of the squash with 1 tablespoon of olive oil. Season with Kosher salt and freshly ground black pepper. Place spaghetti squash, cut side down, on an aluminum-lined baking sheet and roast until tender, about 45-60 minutes.

2. To test if your squash is done, scrap the flesh with a fork. If the strands come off easily, it’s done. Let the cooked spaghetti squash cool for about 5 minutes, then scrape all the flesh into a beautiful pile of spaghetti strands. Taste and season with some more Kosher salt and freshly ground black pepper if needed.

3.Measure out approximately 3 and ½ cups of spaghetti squash. Reserve rest for another use.

4. Wrap measured-out squash in a cheesecloth, clean kitchen towel, or several layers of paper towels. Squeeze out as much moisture as possible. The drier the squash, the more crispy the crust can get.

5. In a medium mixing bowl, combine the squash, egg, mozzarella cheese, parmesan cheese, and season with Kosher salt and freshly ground black pepper. Press squash in a thin, even layer on a parchment-lined baking sheet and form into an approximate 10-inch circle.

6. Bake at 400°F for approximately 20 minutes. Remove from oven, carefully flip, and cook for another 10 minutes.

7. Add desired toppings and bake until done.

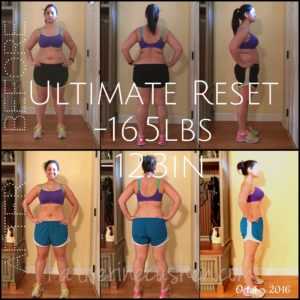
Beachbody’s Ultimate Reset Results!

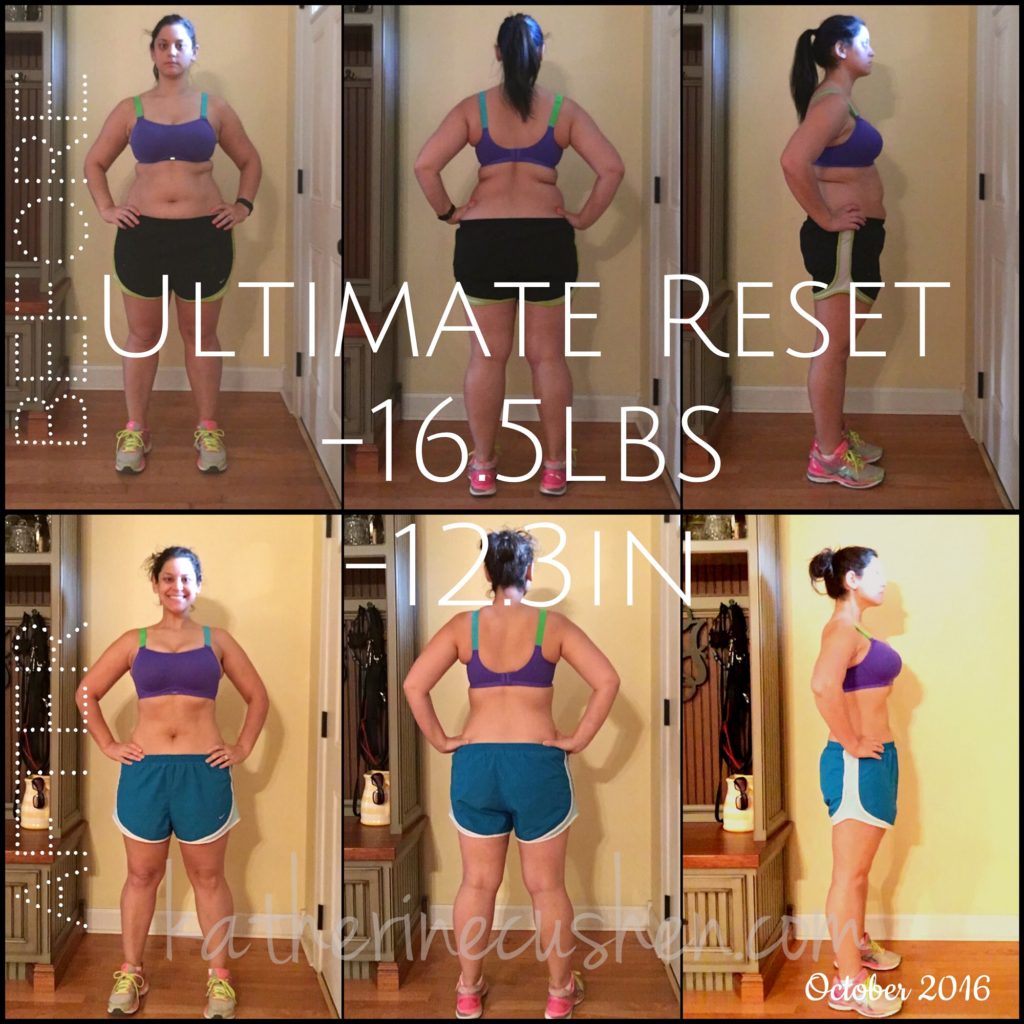
SO embarrassing and empowering all at the same time!

I really don’t even have words. ?
.
When I finally pinpointed the foods that were inflammatory and my body couldn’t process, I knew I needed help and an Ultimate Reset.

img_3944
.
Food is my struggle, so this program is way harder for me than any workout program, but when I see results like these, I know every day was worth it! ?

For 3 weeks I didn’t workout. I followed the plan (( almost )) exactly. I was wheat and gluten free, dairy free and sugar free for 3 whole weeks, and this is what happened.

.
#byebye 16.5lbs!! ?
.

If you’re ready for a REAL reset, ask me about this program or get yours here!

Now it’s time to get back to working out!
.
#mondaymotivation

My company SPOILS me!

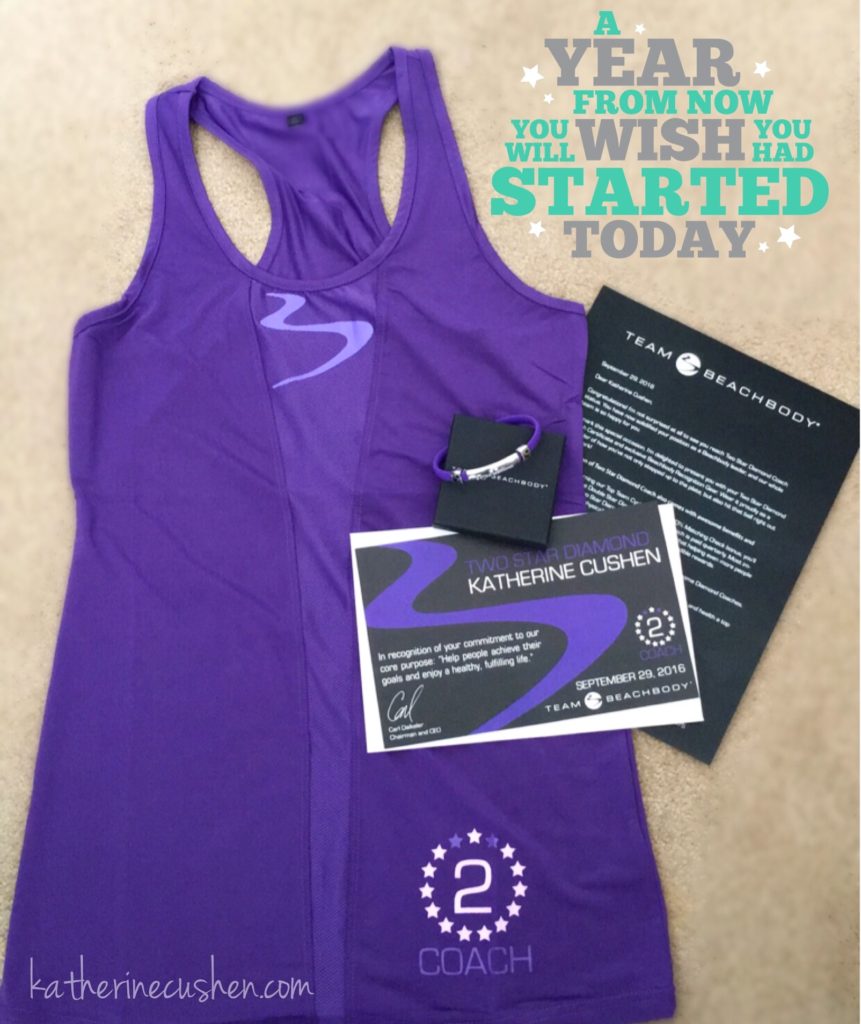
While I was at the post office sending gifts to my coaches, Beachbody was having special gifts for ME delivered! ?
.
This tank top, bracelet and certificate are more than just free gifts from my company. They represent a lot of hard work and dedication. I earned these by helping my awesome team see success of their own, and I’m so proud to wear this shirt for THEM! ??
.
I have the best job ever! ? #thanksbeachbody

I know… I post about earning free stuff all the time. Haha I should really go make a list. ??

Interested in learning more about how you too could be changing lives and earning fun free gifts? Apply here!

.img_4228
#coachlife #spoiled #freeswag

Healthy Pup!

FINALLY! We just got the best news! ?
.
In late 2014, Emma weighed the most she’s ever weighed, and I finally demanded the vet run more tests because I had done everything else I knew to do, and I wanted to be the best dog mom I could be! ?
.
We discovered Emma’s thyroid levels were so low, they literally wouldn’t register on the scale. ? BUT today, after almost two years of working with her and getting her proper medication, Emma has lost 25lbs and CLEARLY feels better! This sweet pup can now jump as high as I am tall! ?
.
Today the vet used the words “immaculate blood work,” and “PERFECT body condition!” Emma is at her ideal weight, and at almost 5 years old, she’s the healthiest she’s been in years! ?
.
? Happy Friday!

img_4068

3 Beachbody Ultimate Reset Stir-Fry Recipes

I recently finished Beachbody’s Ultimate Reset for the second time and had amazing results!

 img_3944

After the first time through, I realized if you stick to a few of the recipes instead of eating every single meal in order you will save money and time. For me, the stir-fry recipes were great options because they use basically the same ingredients, taste just a little different, and my husband would also eat them, so doubling the recipe was easy!

img_3868

Asian Stir-Fry (makes 1 serving)

1 Tbsp. extra-virgin coconut oil

2 cloves garlic, chopped

1 Tbsp. grated fresh ginger

1/2 medium carrot, cut into thin diagonal slices

1/2 cup broccoli florets

1/4 medium red bell pepper, sliced

1 small head bok choy, chopped into bite-sized chunks

1 1/2 tsp. sesame oil

1 Tbsp. Bragg Liquid Aminos

Heat coconut oil in large skillet or wok over high heat. Add garlic, ginger and carrot; cook, stirring constantly for 1 minute. Add broccoli; cook, stirring frequently, for 4 to 5 minutes. Add bell pepper and bok choy. Reduce heat to medium. Cook 2 to 3 minutes or until tender-crisp. Turn off heat. Add sesame oil and Bragg Liquid Aminos. Mix Well.

Garlic Veggies (makes 1 serving)

2 tsp. olive oil

2 cloves garlic, crushed

1 medium carrot, cut into thin diagonal slices

1/2 medium head broccoli, cut into bite-sized florets

1 Tbsp. water

1/2 medium zucchini, cut lengthwise, sliced

1/4 medium red bell pepper, cut into 1-inch strips

2 Tbsp. fresh lemon juice

1 1/2 tsp. Bragg Liquid Aminos (to taste; optional)

Heat oil in large skillet over medium-high heat. Add garlic; cook, stirring frequently, for 30 seconds. Add carrot and broccoli; cook, stirring frequently, for 1 minute. Add water. Cover; cook for 1 minute. Remove cover. Add zucchini and bell pepper; cook, stirring frequently, for 2-3 minutes or until tender-crisp. Remove from heat. Add lemon juice and Bragg Liquid Aminos (if desired); mix well.

Stir-Fried Veggies (makes 1 serving)

1 1/2 tsp. extra-virgin coconut oil

1 tsp. sesame oil

1/2 medium carrot, cut into thin diagonal slices

1/4 cup broccoli florets

1/4 medium red bell pepper, sliced

1/4 medium zucchini, cut lengthwise, sliced

1 1/2 tsp. Bragg Liquid Aminos

Heat coconut and sesame oils in large skillet or wok over medium-high heat. Add carrot; cook, stirring constantly, for 1 to 2 minutes. Add broccoli; cook stirring frequently, for 4-5 minutes. Add bell pepper and zucchini. Cook 2-3 minutes or until tender-crisp. Turn off heat. Add Bragg Liquid Aminos. Mix well.

Dozens of more HEALTHY recipes are included in the meal guide that comes with the program. If you’ve been looking for a way to RESET your body from the inside out, the Ultimate Reset may be just the answer. You can get yours here. Or email me for more information, katherinecushen@gmail.com

Yummy Fried Rice

I had no idea what to cook for dinner, but was starving, so when I came across this recipe, I was so excited! I adapted it to what I actually had in the freezer and pantry, so feel free to do the same! Brown rice and less soy sauce makes this a little healthier. My husband and I both loved this Fried Rice, and I can see it being a staple in our home!

Hope you enjoy!

**For extra flavor, don’t forget to add butter and salt to the rice as it cooks!**

IMG_2122INGREDIENTS

  • 3cup finely chopped onion
  • 2 12tablespoons olive oil
  • 1 egg, lightly beaten (or more eggs if you like)
  • 3 drops soy sauce
  • 3 drops sesame oil
  • 8 ounces cooked lean boneless pork or 8 ounces chicken, chopped
  • 1cup finely chopped carrot (very small)
  • 1cup frozen peas, thawed
  • (I use 2 cups of a precut, frozen mixture of peas, carrots, green beans, lima beans and corn instead of the carrot and peas.)
  • 4 cups cold cooked rice, grains separated (preferably medium grain)
  • 4 green onions, chopped (optional cause I never have them!)
  • 2 tablespoons light soy sauce (add more if you like… I add a lot more! hehe)

DIRECTIONS

  1. Heat 1 tbsp oil in wok; add chopped onions and stir-fry until onions turn a nice brown color, about 8-10 minutes; remove from wok.
  2. Allow wok to cool slightly.
  3. Mix egg with 3 drops of soy and 3 drops of sesame oil; set aside.
  4. Add 1/2 tbsp oil to wok, swirling to coat surfaces; add egg mixture; working quickly, swirl egg until egg sets against wok; when egg puffs, flip egg and cook other side briefly; remove from wok, and chop into small pieces.
  5. Heat 1 tbsp oil in wok; add selected meat to wok, along with carrots, peas, and cooked onion; stir-fry for 2 minutes. (I use uncooked and frozen veggies, so this takes longer.)
  6. Add rice, tossing to mix well; stir-fry for 3 minutes.
  7. Add 2 tbsp of light soy sauce and chopped egg to rice mixture and fold in; stir-fry for 1 minute more; serve.
  8. Set out additional soy sauce on the table, if desired.

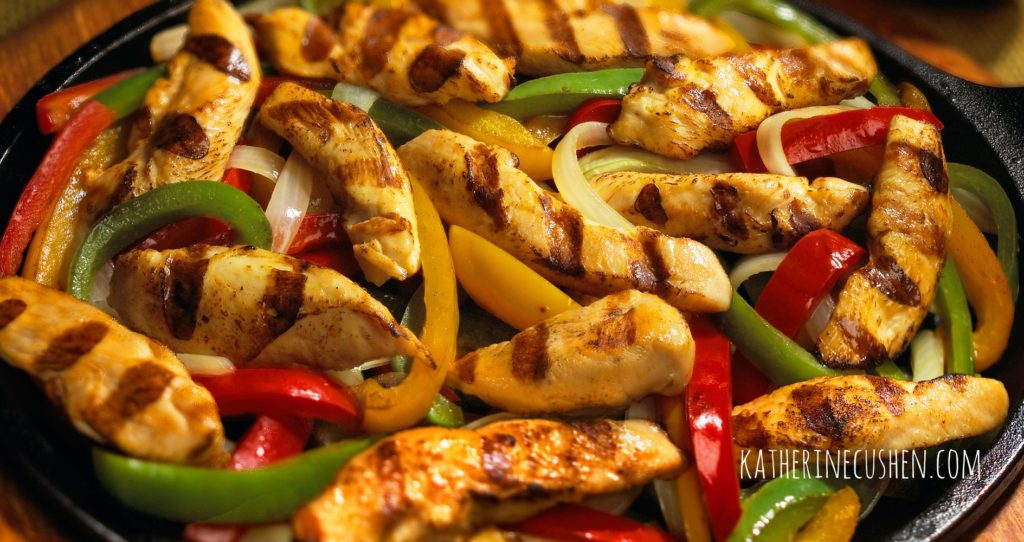
21 Day Fix Chicken Fajitas

Y’all… this is one of my FAVORITE recipes, and it seems appropriate to share on Cinco de Mayo! Though, to be honest.. we have it at our house almost weekly! It makes enough for the husband to have lunch the next day too!

chicken-fajitas

Ingredients:

1 tsp            chili powder
1/2 tsp        sea salt or Himalayan salt
1/2 tsp        ground cumin
1/2 tsp        garlic powder
2 tsp           olive oil, divided use
4 (5-6oz)   raw chicken breast, boneless, skinless, cut into 1/2-inch strips
1                  medium red (or green) bell pepper, cut into thin strips
1                  medium onion, thinly sliced
1 TBS         fresh lime juice (I don’t like the lime juice, but my hubby does!)
8                 large romaine lettuce leaves
or               whole wheat tortillas (we use the tortillas!)
1/2             medium avocado, thinly sliced
or               (and sometimes and hehe) low moisture cheese
1 cup         fresh salsa

Directions:

  1. Combine chili powder, salt, cumin, garlic powder, and 1 tsp oil in large resealable plastic bag.
  2. Add chicken, bell pepper, and onion; mix gently to coat. Refrigerate for 15 minutes.
  3. Heat remaining 1 tsp oil in large nonstick skillet over medium-high heat.
  4. Empty contents of bag into skillet; cook, stirring frequently, for 5-6 minutes or until chicken is cooked through.
  5. Remove from heat. Add lime juice (if desired).
  6. Evenly top lettuce leaves with chicken mixture, avocado (or cheese) and salsa.
  7. Garnish with lime wedges if desired.

Variations:

Substitute beef sirloin for chicken and cook to desired doneness. Shrimp is also a perfect substitution for chicken; simply use 1lb peeled and deveined shrimp and add a flavorful ground chipotle chili powder instead of regular chili powder.


— Recipe from 21 Day Fix Extreme